Ta emot och handicapregistrera ditt resultat från bollens markör. Se ännu fler gratis banguider. Testa premium och utmana dina vänner i match medan Caddee håller ställningarna. Dina tidbokningar hittar du som vanligt på startsidan och du kan skriva scorekort på alla Sveriges banor.
Vad passar dig?
Basic
0 :- / år
Gratis
Allt detta helt gratis:
Annonsfritt
Bokade startklara ronder från MinGolf och Sweetspot
Ankomstregistrering
Spelformer: poängbogey och slaggolf
Banguide till ca 200 Caddeeanslutna banor
Scorekort till samtliga svenska golfbanor
Se allas extraslag på halet
Spara och dela scorekort
Minns din rond med anteckning och foto
HCP-registrering till MinGolf
Månadens ledartavla per bana
Weekly: Vinn presentkort på deltagande klubbar
Light
149 :- / år
Prisvärd
Allt i Basic samt:
Banguide över alla Sveriges golfbanor
Proffsbanguider på över 275 banor
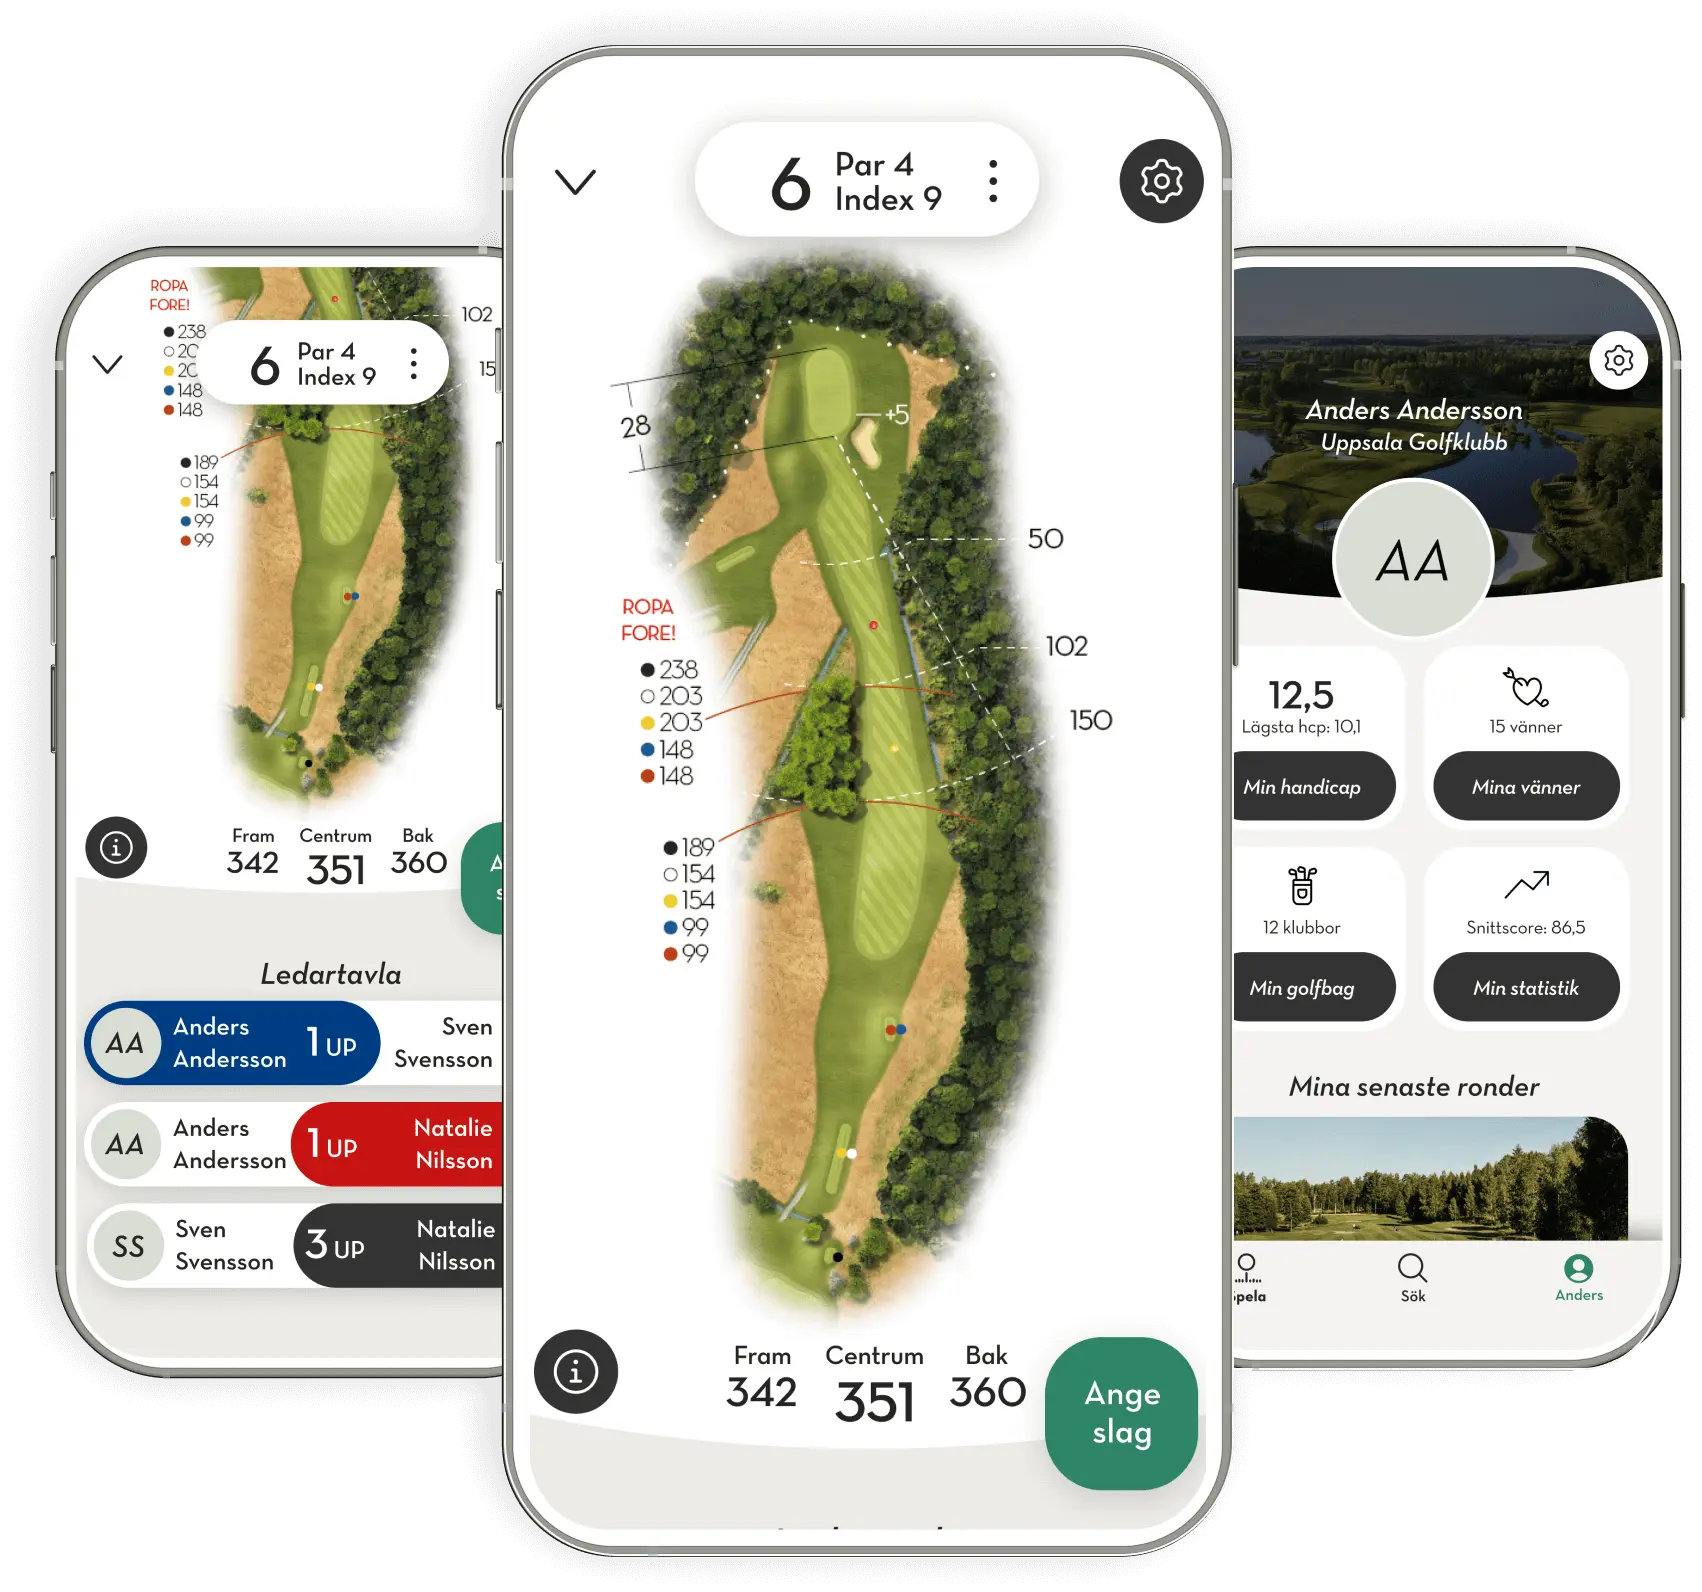
GPS-mått till mitt, fram- och bakkant green
Matchspel 1 mot 1
Matchspel alla mot alla i bollen
Premium
299 :- / år
Populärast
Allt i Light samt:
Bästboll och Bästboll Sneaker
Foursome
2-mannascramble
Min golfbag
Matematisk rondstatistik
Touch Distance: Strategiskt banverktyg
Premium Watch
(Apple Watch)
399 :- / år
Kaxigast
Allt i Premium samt:
I klockan:
GPS-mått till framkant, centrum och bakkant av green
Automatisk synkning med mobilen
För score för alla i bollen
Se allas extraslag på hålet
Matchspel
Ledartavla inom bollen med individuella scorekort
Mät ditt slag
Hälsodata: steg, distans, höjdskillnad, puls, tidsåtgång och kalorier
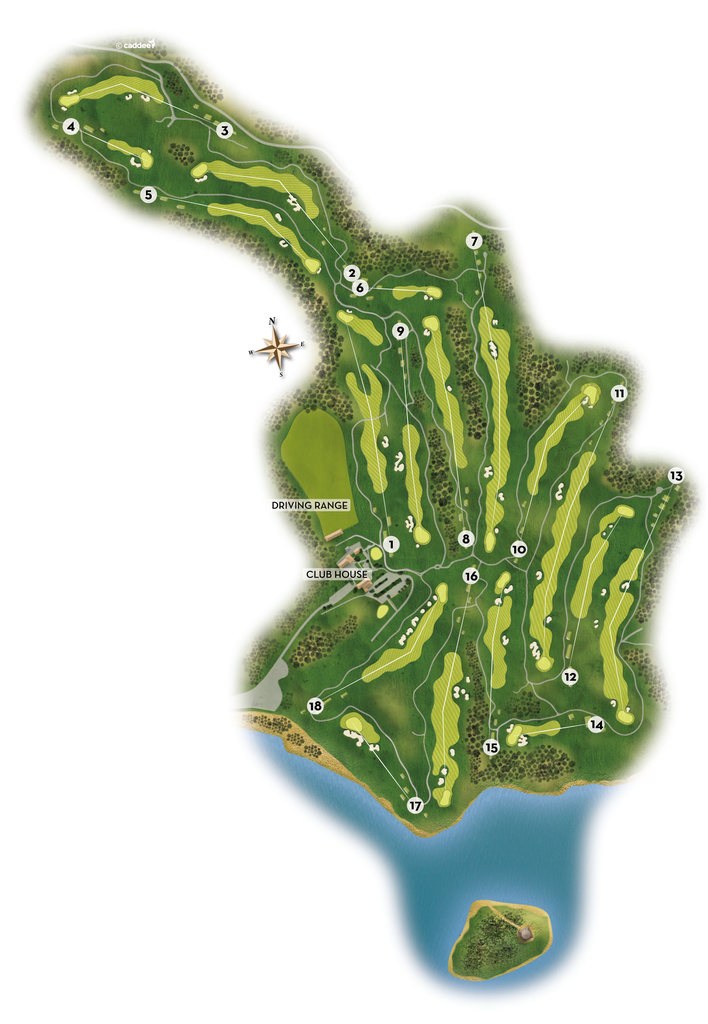
Alcanada
1
Par 5 - Index 11
This opening hole is a challenging par 5. Single handicappers should keep their tee shots to the right side of the fairway and then attack the green with the second shot, crossing the creek in front of the green. For those not so brave, lay up the second shot on the top part of the fairway to your left.
Tee
Red373
Blue401
Green415
Yellow450
White458
2
Par 4 - Index 13
The third hole may be a fairly short par 4 at 335m but it can be deceptively hard with a blind tee shot. The fairway bunker on the left can be passed with the tee shot.
Tee
Red280
Blue299
Green302
Yellow314
White335
3
Par 3 - Index 15
Like all par 3s on the course, this one offers an undulating, tricky green. Players should aim at the left side of the green to avoid the huge green side bunker. This is the only hole on the course without a sea view.
Tee
Red124
Blue132
Green146
Yellow160
White188
4
Par 4 - Index 9
Aim at the two trees and the target bunker on the left side of the fairway to avoid the hazard running along the right side of the hole. The shot into the green should not go through the back as the hazard comes around behind it as well. Aim to the left side of the green.
Tee
Red289
Blue323
Green343
Yellow353
White376
5
Par 3 - Index 17
A relatively short par 3 at 156m. Aim at the left side of the green. Make sure to take enough club and not to miss the green to the left as you would face a tough downhill chip.
Tee
Red106
Blue127
Green128
Yellow137
White156
6
Par 5 - Index 5
Enjoy the stunning view from the back tee down the 579m long par 5. The typical Trent Jones bunkers in the middle of the fairway can be carried with the tee shot. Play a fade to the left side of this fairway and then attack the green with the second shot.
Tee
Red523
Blue542
Green544
Yellow561
White579
7
Par 4 - Index 1
Rated as the most difficult hole on the course. Having to play through trees hanging over the fairway on the left side, the player faces an intimidating tee shot on this 416m long, uphill par 4. Keep the drive, and also the second shot, to the right.
Tee
Red341
Blue365
Green384
Yellow398
White416
8
Par 4 - Index 7
Although you have to pass a creek on this par 4, the bigger problem is the tall tree on the left and the bunker on the right side of the landing area. It’s better to attack the green on the right side. Watch out for the pheasants that have made their home in the hazard on the left!
Tee
Red324
Blue346
Green346
Yellow374
White397
9
Par 4 - Index 10
Another uphill par 4 marks the start for the back nine. This fairway is wide open. The key is the right club selection for the uphill shot into the green. You should take one more club than you anticipated for the second shot on this hole in order to reach the green and carry the green-side bunker safely.
Tee
Red307
Blue333
Green333
Yellow348
White363
10
Par 5 - Index 4
A fairly easy 554m long par 5. If you want to attack this hole, the drive should land on the left side of the fairway so you can try to reach the green in two, passing the fairway bunker on the left with the second shot.
Tee
Red494
Blue516
Green517
Yellow535
White554
11
Par 4 - Index 16
This 347m long hole is not a long par 4 but because of the height difference, club selection is important. Play a high shot into the green. Once you have climbed up to the green, take a moment and enjoy the view over the bay of Alcudia.
Tee
Red280
Blue294
Green294
Yellow324
White347
12
Par 5 - Index 18
The easiest hole on the course – if you keep your tee shot to the right. Once you have passed the bunker in the middle of the fairway you can attack this 514m ‘short’ par 5 even with a long iron. On windy days you can feel salty spray coming across from the Mediterranean Sea on your skin.
Tee
Red389
Blue410
Green424
Yellow492
White514
13
Par 3 - Index 14
The real challenge on this par 3 is when the flag is on the top part of this three-level green. You have to take one more club not to end up in the green-side bunker. Wind can be a factor in your club selection.
Tee
Red114
Blue140
Green142
Yellow145
White167
14
Par 4 - Index 8
This par 4 looks fairly easy but only if you keep the drive on the left; then you have a proper angle to hit a high shot into the small, elevated and well-protected green. Avoid the big bunker in the fairway.
Tee
Red244
Blue264
Green283
Yellow297
White326
15
Par 4 - Index 2
With 435m downhill, this par 4 is for the long-hitters. Keep the drive to the right to avoid the fairway bunkers on the left and then attack the tricky green on the left. On windy days, with a breeze coming from the sea, this hole definitely plays as a par 5.
Tee
Red332
Blue335
Green395
Yellow418
White435
16
Par 3 - Index 6
This 212m, par 3 needs all your attention. With cluster bunkers on the left side take at least one more club and attack the green from the right.
Tee
Red157
Blue164
Green181
Yellow194
White213
17
Par 4 - Index 12
Keep your drive on the right side of the fairway on this uphill hole and let the ball come back with a draw. Take a close look at the pin position before selecting the club for your second shot to avoid a long putt on this finishing hole.